User Guide
First Start
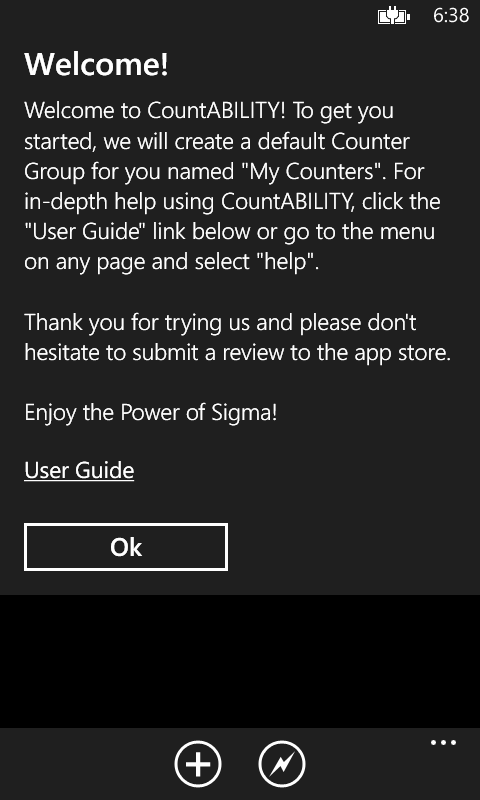
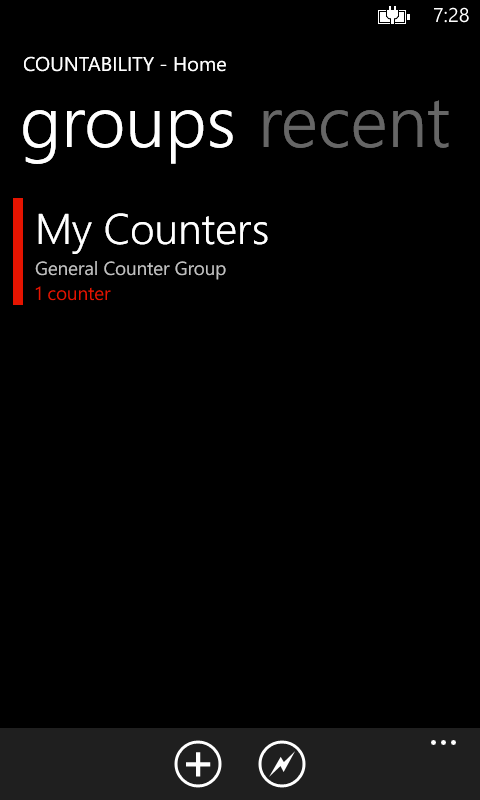
When you start CountABILITY for the first time, the application will greet you and create a default counter group for you. Counter Groups are organizational units for your Counters, you can have as many as you would like or just this one. You can change the name and description of the Counter Group to whatever you would like, but you may not delete it. CountABILITY uses this group as the default container for counters you may not feel are worth organizing as well as your quick counters.
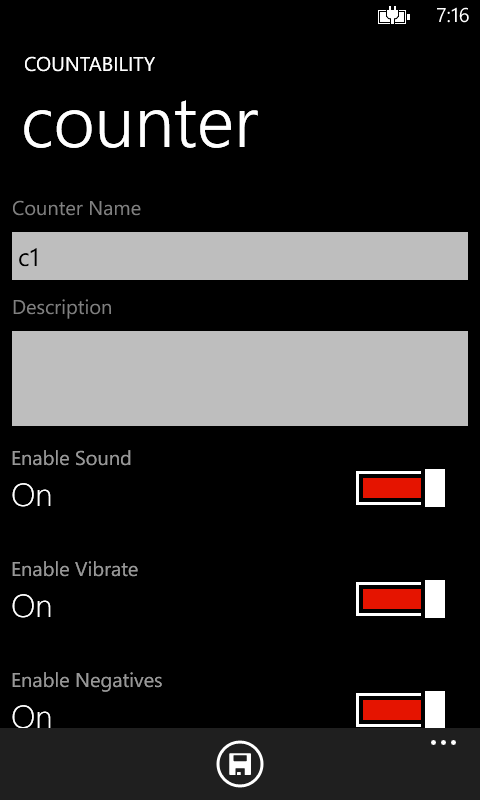
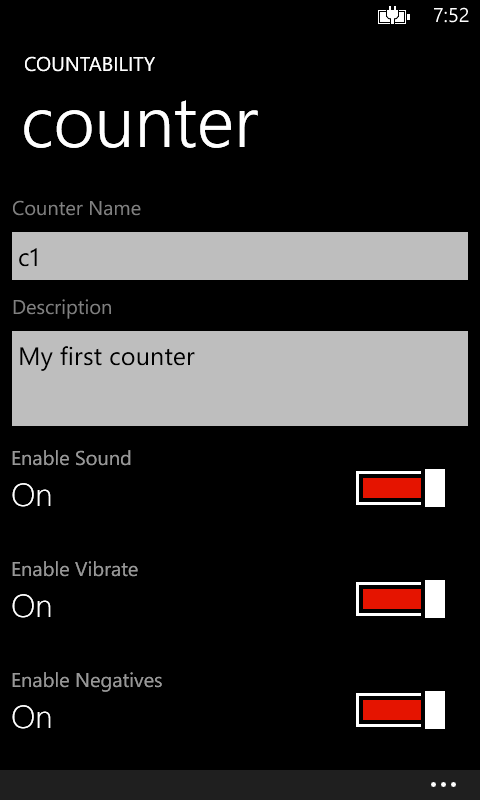
The first time you open a Counter Group, you will be prompted to create a Counter. The counter will have a default name – “c1” – but you can change the name to whatever you wish. (NOTE: If you keep the default name, subsequent counters created in this group will be auto incremented as “c2,” “c3,” and so forth – the ability to customize this pattern is forthcoming) You also have the ability to set the vibration and sound preferences on this page. Don’t worry, you can easily change these settings after you have saved the Counter. Once everything is to your liking, tap the save icon at the bottom of the screen. For more details on creating Counters, please refer to the Counter section of this document.
You are now ready to count! Tap to increment and swipe vertically to decrement. For detailed information on operating the counter, please visit the Using the Counter section.
Managing Counter Groups
While on the Home Page of CountABILITY, tapping the plus sign at the bottom of the screen will allow you to add a new Counter Group.
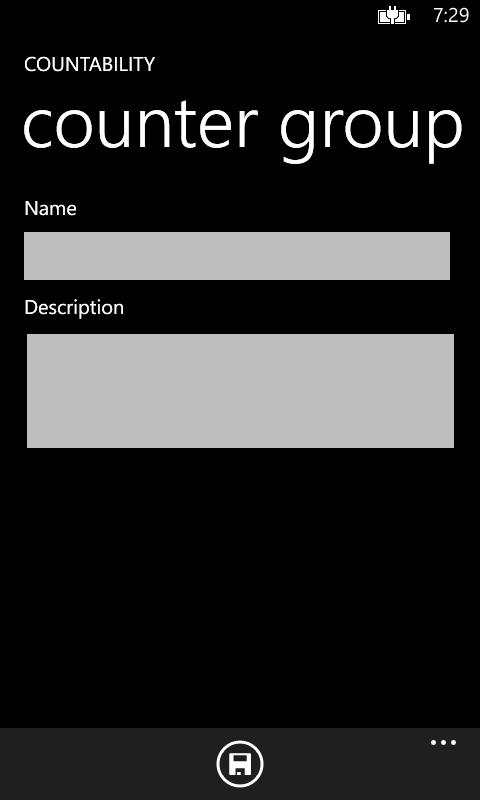
You can now enter your preferences for the new Counter Group. Once you are satisfied with the settings, tap the save icon at the bottom of the screen.
Fields
- Name – The Name of the Counter Group
- Description – A short description of the Counter Group
You can edit or delete a Counter Group by:
- Long pressing a Counter Group in the list on the home page and selecting the appropriate option.
- Selecting “edit counter group” from the application menu on the Counter Group details page and selecting the appropriate option.
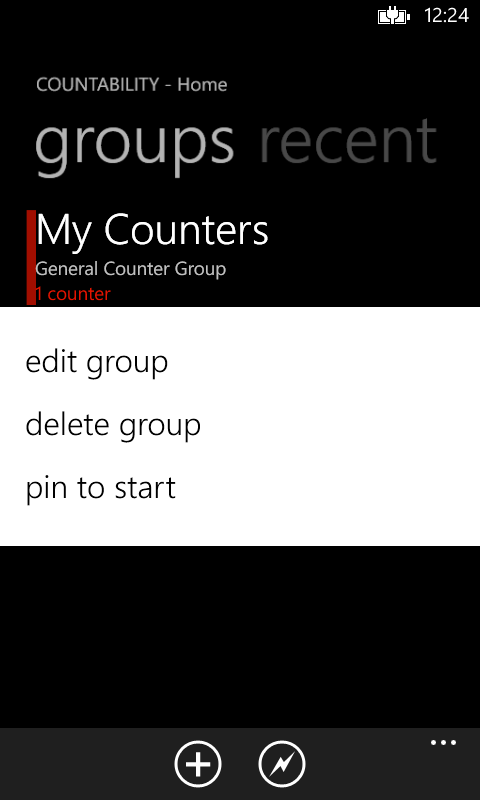
SPECIAL NOTE: Once you edit the Counter Group information, you simply press the back button on your Windows Phone to save the changes.
Managing Counters
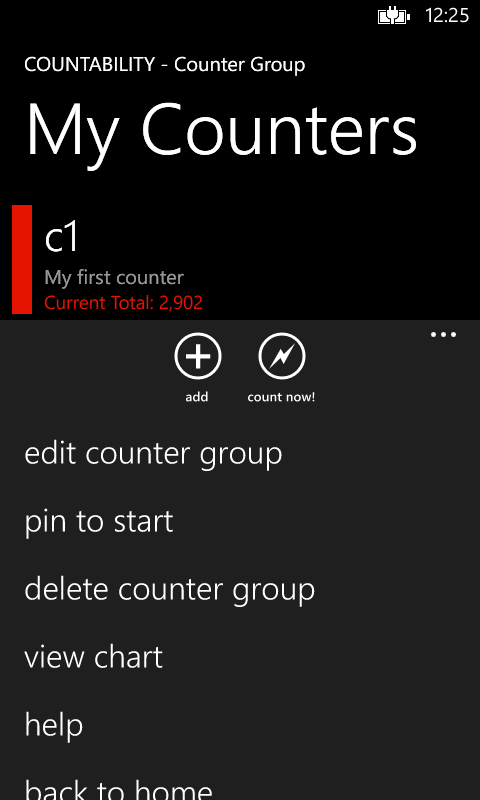
Once you have selected a Counter Group and are viewing the list of Counters, you can tap the plus sign at the bottom of the screen to add a new Counter. You also may select the quick count icon to instantly create a counter that uses you current date and time as the counter name.
SPECIAL NOTE: If you keep the default Counter name when you created the Counter Group, subsequent counters created for that group will be auto incremented as “c2,” “c3,” and so forth. A customizable naming template is forthcoming.
Fields
- Counter Name: The name of the Counter
- Counter Description: Short text describing the Counter
- Enable Sound: Determines whether the counter makes a noise when incremented or decremented.
- Enable Vibrate: Determines whether the counter vibrates when incremented or decremented.
- Enable Negatives: Determines whether the counter will decrement below zero. (NOTE: You cannot edit a counter with a negative value to disable negatives)
You can edit or delete a Counter by:
- Long pressing a Counter in the list on the Counter Group details page and selecting the appropriate option.
- Selecting “edit counter” from the application menu on the Counter page and selecting the appropriate option.
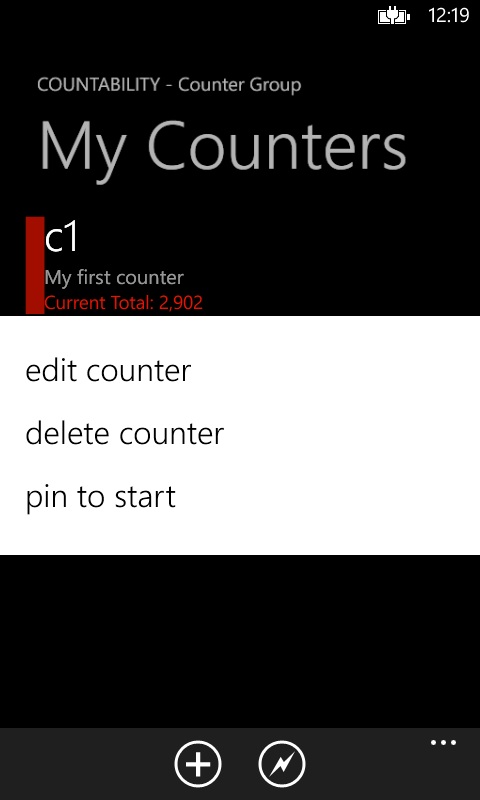
 The edit counter page is identical to the add counter page. SPECIAL NOTE: Once you edit the Counter information, you simply press the back button on your Windows Phone to save the changes.
Using the Counter
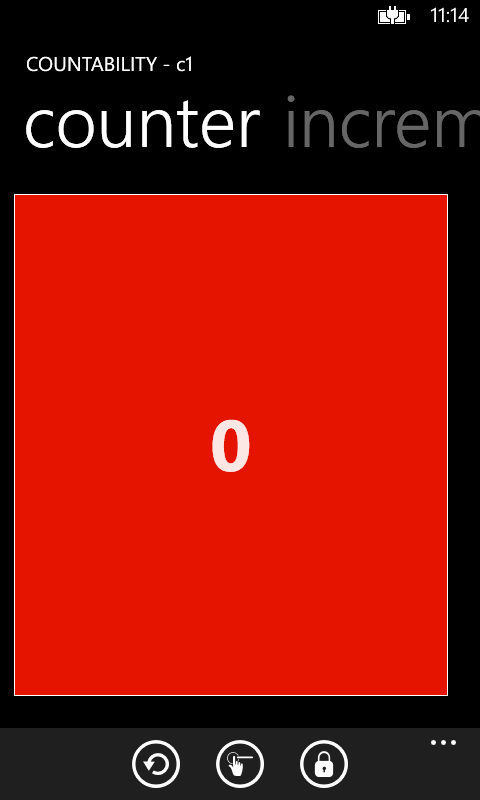
The basic function of the Counter screen is to increment and decrement the number shown in the colored box. Tap inside the box to increment the value, swipe your finger up or down in the box to decrement the value.
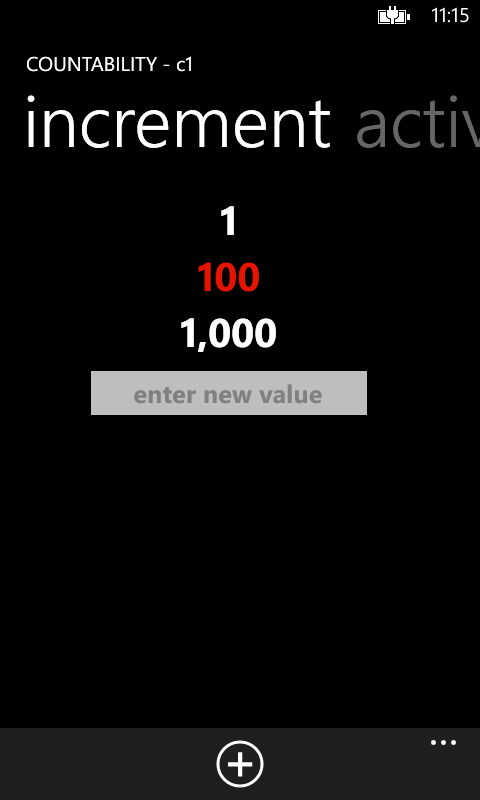
By default, the Counter screen will increment or decrement the value of the counter by 1. The next section of the Counter pivot is the increment panel. The value list allows you to keep a list of the potential values you would increment the counter by. By tapping in the text box at the bottom of the list, you can enter a figure between 1 and 999,999,999 for adding to the list. Once you have entered the value, you can press the plus sign at the bottom of the screen to add the value to the list. Once the desired values have been added to the list, you can select which value to use for changing the counter.
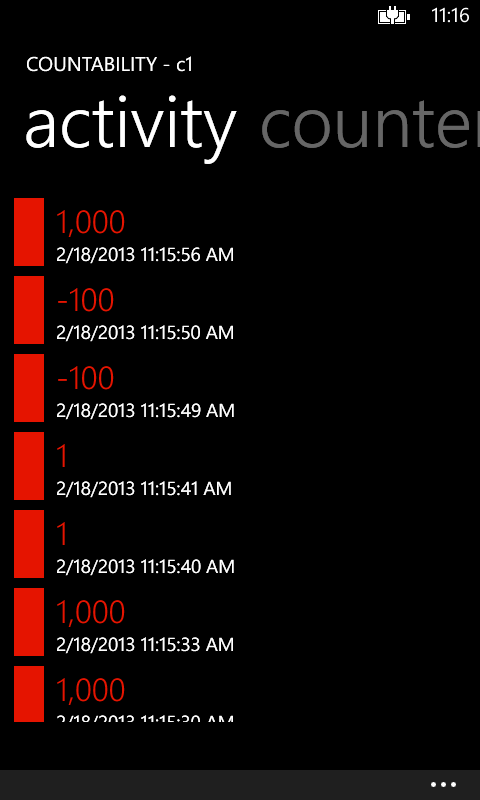
The final panel is the activity panel which is a log of all counting activity for this counter. Please be aware that if you use the “reset counter” function, the log will be erased.
In addition to the ups and downs of counting, the Counter screen offers additional functionality.
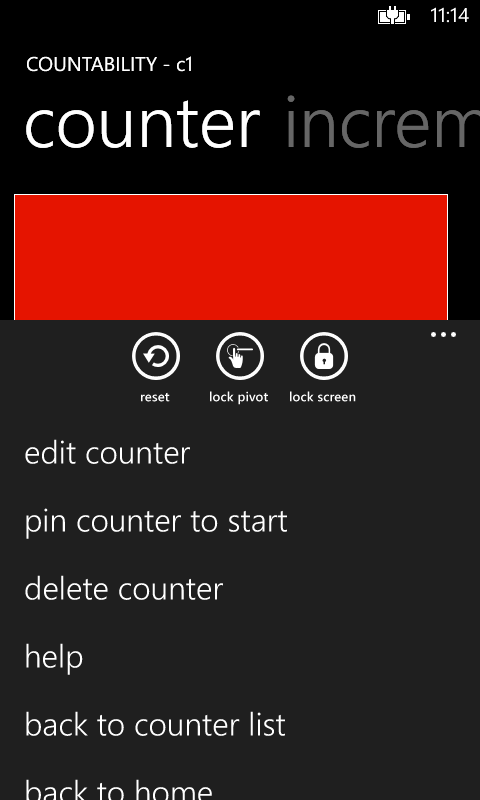
From the Counter screen application bar at the bottom of the screen you can perform several other operations: On the icon bar you can:
- Reset the counter to zero
- Lock the pivot screen to prevent an accidental horizontal swipe from moving to another panel
- Disable the screen lock
On the menu you can:
- Edit the counter properties
- Pin a shortcut to the counter on your start screen. The live tile will update to show you the current value of the counter at any given time. The tile will automatically update when you change the counter value.
- Delete the active counter
Other Functionality
Pinning to Start CountABILITY gives you the option to pin a Counter Group or Counter to the Start Screen. You can do this by long pressing the Counter Group or Counter on the respective listing screen and selecting “Pin to Start.” Also, from the Counters list for a Counter Group, you can select “Pin to Start” from the Application Menu. You can do the same from the primary counting screen.
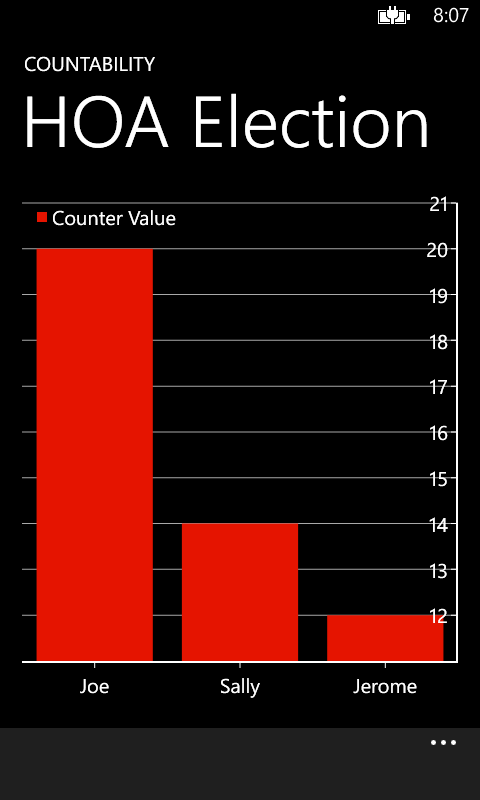
Viewing Chart
Selecting “view chart” from the application menu on the Counter Group page will allow you to see a chart comparing the values of your Counters. The chart will work in portrait or landscape mode. Be aware of your counter name lengths though as there is only so much room on the chart to display them.

Can l do my account